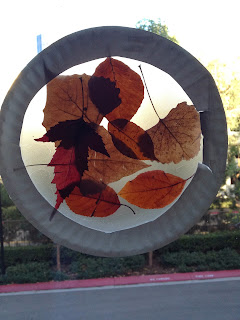
Thanks for Pinterest for being such an awesome place to find cool crafts to do! Here are some I found and did recently!
Paper Mache Hot Air Balloons
The recipe I used was very simple. There were a lot of recipes out there some with hot water, some without. I personally think when you use hot water for things like this and like play dough it works better so thats what I did. It obviously was a huge mess but I knew that getting into it. We did some bowls as well but I really think our hot air balloons turned out the best! I put everyone in the cleaned out sensory tub and showed the little dude how to do it. I sprayed the balloons with cooking spray but really you are supposed to do vaseline I just didn't have any. I had also taped half a roll of a toilet paper roll to the bottom of the balloon to give it more of the hot air balloon shape. I then started mine and watched the little dude do his. I finished mine, and helped his while he started just wanting to squish up all the paper shreds in the paper mache paste. Oh well. Can't win them all and he did do a lot of the work! For the basket I hot glued felt to a strawberry basket! We then painted out hot air balloons and after they were dry we hung them up in the play room!

Papier-mâché
-2 cups boiling water
-2 cups cold water
-1/2 cup flour
Mix flour and cold water. Then pour into boiling water and take off the heat. Mix all together and then pour in a bowl for it to cool down. It will thicken up as it cools down so don't worry about it if it is watery. I thought at first it looked like two much but we used just about all of it!! Although I also had a 3 year old who just wanted to stick his hands in it and get the paper all wet and mushy to play with so that may have been why as well.
We have also made cinnamon and applesauce ornaments which I will thank to Pinterest for showing me how its done but I know for a fact it has been around for years and years. While I wanted to make ornaments out of cookie cutters the little dude just wanted to play with it so I let him do some of that before we started making the real shapes we would end up baking.
Cinnamon/Apple Sauce Ornaments
1 cup of applesauce
1 1/2 cups cinnamon
Mix together until it starts to form a dough. No heat. If it seems too wet add more cinnamon, if it seems to dry then add more applesauce. This is also a dough you will most likely just need to mix with your hands. I LOVE the smell of cinnamon and I had to even stand as far back as I could while mixing because the smell was so strong at first. When it has reached a dough I broke it off into pieces and started to knead it. If it was still too sticky to roll out I just put a little cinnamon in a bowl and rolled the dough into a ball and then coated the ball in the cinnamon.
 |
| Playing with the dough |
 |
| Cinnamon to dunk the dough in |
 I then rolled it out and started cutting out shapes. We did letters, dinosaurs and hearts. Pretty much anything we wanted. You are then going to need to bake it at 200degrees. I did about 2 hours and then left it in the turned off oven over night. You want them to be hard like a rock. You also do not want them so thin because the thinner they are the easier it is for them to break. Since I was doing this with a three year old so did turn out pretty thin but we will just have to be careful with those. I also used a pen to poke a hole through the ornaments before cooking them so we can use their as gift tags or put them on our tree. I kinda want to stick some in my car to have my car smell like delicious cinnamon!


